- Confirm and sign-off the support pks and combination of SPs that will be applied and project/test team available for testing
- Verify all functional and cross-system dependencies are met. Must review and OSS note 822379 (netweaver 7 version)
- Enough Disk space and atleast 85% free space on sapdata filesystem
- Check if file system /usr/sap/trans/data and ../EPS/in has free space, if not clean-up old support package data files or Pat files in EPS/in
- Post a system message & a login screen message indicating the outage (refer to procedure Applying Support Packages).
- Check if no tablespace is over 85 % full
- Verify if you have a recent backup., if not schedule a full on-line backup. If production, have a backup just before Support pkgs to be safe.
- Unpack all required SP's and then load them into SPAM and verify that all queues are OK e.g SAPCAR -xvf /sapcd/sp/XXXXXXX.CAR –V
- Update Spam with latest version from Service marketplace. Also ensure binaries R3trans and tp are updated if necessary. If you are not sure, usually it will not hurt to update these anyway.
- Define Queue and perform TEST import and report any SPDD/SPAU conflicts to project/developers
- Prepare one excel sheet with component list and uncarred file name.
- Check permission on components present in EPS/in. Pat file should have owner as sidadm belongs to sapsys group.
- Carry out any modifications done at development for same activity. Import the transports before you start import of support packages. Once started you are not allowed to do any transports and even if you try you will end with error OCS is locked by username by transaction SPAM. In this case its very difficult to apply notes or to do any changes.
Wednesday, April 24, 2013
SAP Support Patches Check List
SPAM Import Steps and Explanation
1. PROLOGUE
This phase checks whether you are authorized to import Support Packages.
2. CHECK_REQUIREMENTS
This phase checks various requirements for importing a Support Package, for example, whether the transport control program tp can log on to your system.
3. DISASSEMBLE
This phase unpacks files from the appropriate EPS parcels and saves them to the transport directory.
4. ADD_TO_BUFFER
This phase places the queue in the transport buffer of your system.
5. MODIFY_BUFFER
This phase prepares the transport buffer for correct processing of the following import phases.
6. TEST_IMPORT
This phase performs a test import for the queue with the transport control program tp. The system checks whether there are objects that are in open repairs and that are overwritten during the import, or whether other conditions prevent the import of an object.
7. IMPORT_OBJECT_LIST
This phase imports the object lists for the Support Packages in the queue into the system.
8. OBJECTS_LOCKED_?
This phase checks whether there are objects that are overwritten by the import, and that are still in unreleased requests.
9. ADDON_CONFLICTS_?
This phase checks whether there are conflicts between objects in the queue and any installed add-ons.
10. SCHEDULE_RDDIMPDP
This phase schedules the transport daemon (program RDDIMPDP).
Import 1 Module
11. CREATE_VERS_BEFORE
This phase generates versions of the objects that are contained in the Support Packages in the queue (if this option is set).
12. SPDD_SPAU_CHECK
In this phase, the system checks if a modification adjustment is necessary (transactions SPDD/SPAU).
13. DDIC_IMPORT
This phase imports all ABAP Dictionary objects in the queue.
14. AUTO_MOD_SPDD
This phase checks whether all modifications to ABAP Dictionary objects can be adjusted automatically.
15. RUN_SPDD_?
In this phase, you are asked to adjust your modifications to the ABAP Dictionary objects by calling transaction SPDD.
16. LOCK_EU (only for import mode downtime-minimized)
This phase locks the development environment.
17. INACTIVE_IMPORT (only for import mode downtime-minimized)
This phase imports program code and program texts in an inactive state.
18. DDIC_ACTIVATION
This phase activates the imported ABAP Dictionary objects.
Import 2 Module
19. IMPORT_PROPER
This phase imports all the Repository objects and table entries if they were not already imported in the INACTIVE_IMPORT phase. This is preceded by actions such as table conversion and activation of the name tabs.
20. PREPARE_XPRA
This phase prepares the execution of the XPRAs and after-import methods.
21. UNLOCK_EU (only for import mode downtime-minimized)
This phase unlocks the development environment.
22. AUTO_MOD_SPAU
This phase checks whether modifications can be adjusted automatically.
23. XPRA_EXECUTION
This phase executes the XPRAs and after-import methods.
24. ABAP_GENERATION
This phase generates the runtime objects for the imported Repository objects (ABAP source texts and screens).
Clean Up Module
25. RUN_SPAU_?
This phase prompts you to adjust your modifications to Repository objects by calling transaction SPAU.
26. CLEAR_OLD_REPORTS (only for import mode downtime-minimized)
This phase deletes the obsolete versions of program code and program texts in the database.
27. EPILOGUE
This phase completes the import. Among other things, it checks whether the queue has been processed completely.
Monday, April 22, 2013
No valid maintenance certificate found for system
Error:
No Valid Maintenance Certificate found for system

Scenario:
While executing SPAM tcode system gives warning Missing maintenance certificate.
Resolution:
As per sap system need to have oracle maintenance certificate. This certificate need to be applying once in three months.
Downloading Certificate
1. You can download oracle maintenance certificate from Solution manager by going to transaction solman_workcenter > Change management > License management > Select the system and Download Licenses.
2. Go to Service market place > Keys & Requests > Request License Keys > Select a system from list and proceed further as instructed > Download maintenance certificate to local pc.
Applying License
Go to TCode Slicense > Click on Install Button > Select downloaded license script and Apply License Key.
CAR error message : SAPCAR: Can not change date for CSRXXX.PAT
Error:
CAR Error Message : SAPCAR : Can not change date for uncared support package while applying patches. This error comes when you try to import spam/saint upgrade

Reason :
This error occurs because sidadm will not have the authorization to change the uncarred file status.
Solution:
1.Login into /usr/sap/trans/EPS/in
2.Check the permission for uncared .pat file. Usually owner of the file should be sidadm blongs to group sapsys.
3. If permissions are not like above change permission as below
chown gspadm:sapsys CSR0120031469_0070395.PAT
chmod 777 CSR0120031469_0070395.PAT
4. Execute the import. This will come into queue.
Friday, April 19, 2013
Tool connector failed with exec(): 0509-036 can not load program
Issue :
While upgrading SAP SUM tool or Upgrade tool gives error Tool connector failed with exec(): 0509-036 can not load program.
0509-120 An offset in the .loader section header is too large

Resolution:
Patches are uploaded on to aix server using FTP client. While uploading patches selected mode was Auto or ASCII. While uploading patches they need to be uploaded in Binary Mode. After uploading patches in binary mode restart the process.
Reference:
SUM Tool gives SIDADM credentials wrong
Issue
Sum tool gives error " The provided sidadm credentials are either incorrect "

Reason:
An OS user that can be verified is required for authentication on the
target host on which the SAP instance runs. If the user/password check was successful, the system checks whether the user has execute rights for the file sapstartsrv.exe (Windows) or write authorization for the file
sapstartsrv (non-Windows platforms). If this is the case, the required
operation is executed. Thus, you can set the access to the protected
operations with greater precision by setting the file access
authorizations.
Some mechanisms have been introduced on other operating systems that only allow a password check for certain users with root rights (for example,
shadow passwd). Sapstartsrv cannot generally verify users of this type.
To work around these restrictions on the UNIX platforms, we introduced an
authentication in sapstarstrv using the external help program sapuxuserchk.
However, the installation or the upgrade and sapcpe cannot set the s-bit automatically.
Therefore, this must be performed manually in every executable directory.
Resolution:
Execute following commads where sapuxuserchk available.This will
chown root:sapsys sapuxuserchk
chmod u+s,o-rwx sapuxuserchk
If appying on central instance change permission at following locations.
/usr/sap/SID/DVEBMGS00/exe
/usr/sap/SID/SCS01/exe
Reference
SAP Note : 927637
Friday, April 12, 2013
Central User Administration Configuration

Configuring Central User Administration
Environment:
ECC6.0 with Enhancement Package 5 ABAP Stack
Introduction:
Usin
g Central User Administration, you can maintain user master records centrally in one system. Changes to the information are then automatically distributed to the child systems. This means that you have an overview in the central system of all user data in the entire system landscape.
Distribution of the data is based on a functioning Application Link Enabling landscape (ALE Landscape). In this way, data can be exchanged in a controlled manner and is kept consistent. An ALE System Group is used by the Central User Administration to distribute user data between a central system and child systems linked by ALE. You should therefore familiarize yourself with basic information about the ALE Integration Technology.Benefits of Central User Administration
· Administration of a whole system landscape from one single central system
· Overview of all user data in the whole system landscape
· Consistent user data in the whole system landscape
· Additional local maintenance is still possible
· Requires little resources (hardware and/or diskspace)
· Consistent user master data in the whole system landscape
· One single point of administration and control
Disadvantages
- Maintenance of CUA central system has immediately impact on production –no test of CUA functionality possible
- Unavailability of CUA central system has impact on the whole system landscape
- Planned downtime of CUA central system has to be confirmed by all system owners
- High volume of user data and high number of changes to user master records (e.g. caused through client copy in DEV) can result in decrease of performance of the CUA central system
- Not suitable for customers where responsibilities for user administration are organizationally split based on systems
Pre Requisite
· You have defined logical systems. You can see list of logical system names from SCC4.
· RFC Connections are created between central and child systems.
· User ID used in all the system is ADM_CUA and this users is a communication user Authorization for Central system SAP_BC_USR_CUA_SETUP_CENTRAL and SAP_BC_USR_CUA_CENTRAL.
· Authorization for Client system SAP_BC_USR_CUA_SETUP_CLIENT and SAP_BC_USR_CUA_CLIENT.
Architecture
Central User Administration consists of Central System and child systems. The central system sends data to the child systems and each child system also sends data to the central system.


Setting Up CUA
Go transaction code BD64 and create a model view


Create the new model and SAVE it. After this you need to BAPI to created model view and input parameters as shown below. Give your sender and receiver systems logical systems names.

Generate partner profiles for CUA by selecting Generate Partner Profiles from Environment Menu.


After successful profile generation distribute model view. This will distribute CUA across the child systems.
Follow above same steps in admin and child systems. After configuration is completed in both systems go TCode SCUA in admin system.
 u
u
Create a distribution model and input receipent system.

After successful configuration you can see system tab in su01 of any user. Here you can maintain user system and and his assignments centrally.
Deactivating CUA
Procedure in the Central System
1. Log on to the central system.
2. Run report RSDELCUA (for example, using transaction SA38).
The system displays the screen Delete Entire Central User Administration. The name of the distribution model is displayed under Central User Administration.
3. In the Delete section, choose the Complete CUA, and set the Test indicator. Then choose Execute. The system displays an overview of the data to be deleted. You can jump to transaction SE16 by double clicking.
4. If you are happy with the test result, choose Back and deselect the test indicator. Then choose Execute. The system displays an overview of the deleted data.
5. In transaction WE20, delete the data about the sending system (central system) and the receiving systems (child systems); that is, under Partner profile for Partner type LS, delete the message types CCLONE and USERCLONE (such as ADMCLNT324 and PRDCLNT324) for the central and child systems. If this means that only the default message type SYNCH remains, you can also delete the partner profiles completely.
6. In the Implementation Guide (IMG, transaction SALE), choose Modeling and Implementing Business Processes ® Maintain Distribution Model and Distribution Views (transaction BD64).
a. In change mode, select the model (in this example, CUA), and choose Delete.
b. Choose Save.
7. Change the system user (such as CUA_PRD) in transaction SU01 by removing the role Z_SAP_BC_USR_CUA_CENTRAL on the Roles tab page. If this means that the user is now assigned absolutely no authorizations, you can assume that it is not used for any other purpose, and can delete it.
Procedure in Child System
1. Delete the data for the sending system (central system) in transaction WE20.
If only the automatically created message type SYNCH remains, you can completely delete the partner profile. However, "empty" partner profiles of this type do not cause any disruption. If other message types are still entered, the partner profile is still being used in other ways, and may not be deleted.
2. In the Implementation Guide (IMG, transaction SALE), choose Modeling and Implementing Business Processes ® Maintain Distribution Model and Distribution Views (transaction BD64).
3. In change mode, select the model (in this example, CUA), and choose Delete.
If the system does not now display a dialog box asking: Model view CUA may not be changed in this system. Delete CUA?, perform the following steps:
a. Call the Edit model view dialog screen by double clicking the model.
b. Change the Maintenance system to the local system name (in this example, PRDCLNT324).
c. Choose Continue.
d. Choose Delete again.
e. Confirm the system query Model view CUA may not be changed in this system. Delete CUA? with Yes.
4. In the child system, change the system user (such as CUA_PRD_324) in transaction SU01 by removing the role Z_SAP_BC_USR_CUA_CLIENT on the Roles tab page. If this means that the user is no longer assigned any roles or any profiles, you can assume that it is not used for any other purpose, and can delete it.
As the RFC destinations that you created along with CUA may be used for other ALE connections, you should not delete the RFC destinations, but rather only remove the roles with CUA authorizations from the system user used for CUA.
Resources
http://help.sap.com/saphelp_nw2004s/helpdata/en/bf/0b13bb3acd607e10000000a11402f/content.htm
SAP Tutor Central User Administration under service.sap.com/security → Education and Workshops
Wednesday, April 10, 2013
SAP BO4.0 Installation Procedure
BO XI 4.0 Sever Installation
Product Full Name: SAP BusinessObjects Business Intelligence platform 4.0 Support Package 4
Installation Scenario:
Installation method is standalone installation where BO , IIS and Database are installed on same machine on windows environment.
Pre Requisite:
Operation System: Window Server OS – 64Bit
Microsoft .net Frame Work: Version 3.5 SP1 or Higher
Software Download Path:
http://service.sap.com/swdc > Analytics Solutions > Browse the Analytics Solutions Portfolio > Installation and Upgrade> SBOP BUSINESS INTELLIGENCE PLATFORM (SBOP ENTERPRISE) > SBOP BI PLATFORM (ENTERPRISE) > SBOP BI PLATFORM 4.0 > Select the Operating system and proceed with downloads
Installation Proce
dure: Click on SBOP BI PLATFORM 4.0 SP04 (incl. FP03) SERVER WIN 64B ( CD Number 51043404 ) and click on it.

Select preferred installation language and proceed to next

All pre requisite checks are performed and summary will be displayed and if any errors occurred in check are displayed. After correcting error proceed further.


Accept the terms and conditions and proceed to next. This screen will prompt you for product key. This key can be obtained from https://websmp105.sap-ag.de/licensekeys


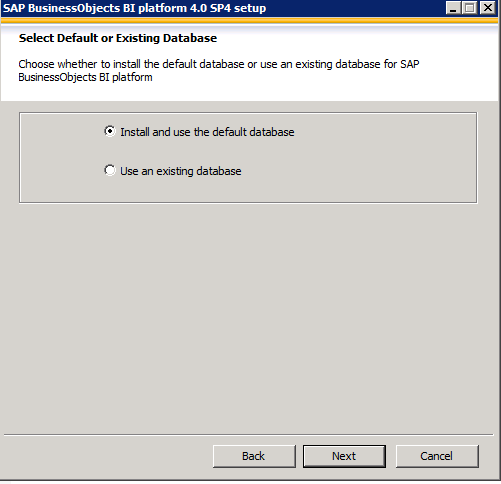
Select the installation type. In my scenario im doing an full installation. For webtier configuration refer to installation document.

By default installation program will be installed in you operating system drive. If you want to change you can change the target directory

Select the webserver you would to install. You can user IIS or tomcat. By default installation program can install tomcat for you and you can proceed further.


Click on next and proceed further
Ports and Login Credential Configuration
From next screen it will give you the ports list it will be using. Make sure ports are open.


Select the option if you would like to connect your BO server in solution manager.


By clicking on next will install BO on your server. After successful completion of installation carry out with post installation steps.

By clicking on next will install BO on your server. After successful completion of installation carry out with post installation steps.

On successful installation you can find SAPBO4.0 ( Central Configuration Manager, Central Management Console )

Post Installation Steps
1. Copy the transports from installation directory and import the requests in BI. This will integrate the connectivity between your BI and BO.
Resources
Sizing Tool:
http://www.sdn.sap.com/irj/scn/index?rid=/library/uuid/1055c550-ce45-2f10-22ad-a6050fff97f1
References
http://service.sap.com/bosap-downloads
https://websmp210.sap-ag.de/bosap-support
Subscribe to:
Posts (Atom)


