Banner 468 x 60px

Wednesday, October 30, 2013

Failed to connect to BI platform

0 comments
Error:


While connecting to BI system from dashboard designer Query Browser > Add Query > After logging onto BO system, while browsing for query you get error " Failed to connect to BI platform. If this error keeps occurring then refer SAP note 1668437 for trouble shooting


Resolution


This error comes because system could not reached your BO web server. For trouble shooting follow SAP note 1668437.


As per SAP note perform all tasks and check port number under url Win2003EEx64:8080/dswsbobje. Same Port number need to be maintained in


CMC > Applications > Web service > Under Properies maintain same port number which you have got from testing with reference to above said note.


Read more...

SAP Document Management System (DMS) Installation

0 comments
SAP Document Management System (DMS) Installation

Applies To

Operating System : Windows Server 2008 R2
Database : Max DB

Summary

The Document Management Service (DMS) is a service of the information management infrastructure provided by the Knowledge Provider within the framework of SAP Web Application Server. The central task of the DMS is to process documents and document-like objects on the bas is of application-specific content models. Only the DMS can modify document administration data and save this data in as storage medium, such as the SAP database.

Index

Pre Requisite
Required SAP Component Level
IIS Roles Required
Firewall Settings
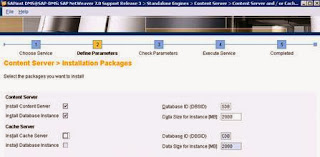
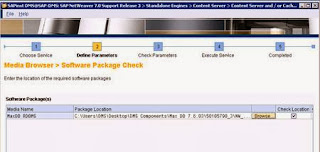
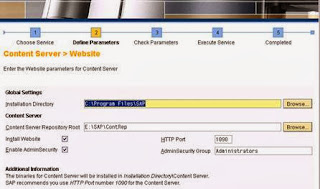
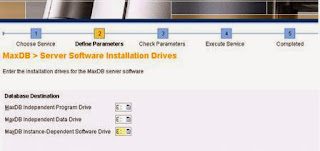
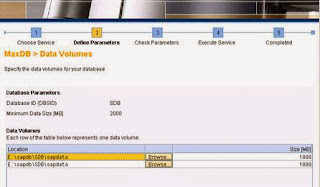
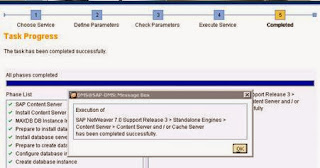
Content Server Installation
Testing Content Server Installation 
Windows Server Tasks before Configuring SAP 
MAX DB GUI Installation
Configuring SAP to Connect to DMS References


Introduction

In recent years , the increasing complexity of products has led to increasingly complex development tools , such as computer-aided  design  (CAD)  systems , and  m ore  advanced  production  processes , such  as  computer-aided manufacturing (CAM) systems . CAD and CAM tools have been used to optimize production times and quality.

As this process becomes m ore complex, the systems for managing the technical documents involved need to be m ore sophisticated. The m any different procedures for describing products (such as design drawing, photographs, and texts) mean that there is a huge increase in digitally stored data.

The quality and availability of documentation is becoming increasingly important. The Document Management
System (DMS) in the SAP System offers the following advantages:

If you link document management to computerized development and production systems, you avoid data redundancy, maintain consistency of data, and minimize the workload involved in entering and updating your data.

In order to us e large databases to the full, you need to be able to exchange data quickly and securely. You can access your data directly using electronic search tools, or find documents using known parameters. You can also search for and display documents (original application files) via the Internet/intranet.

You can us e document distribution to distribute documents that are managed in the document management system (DMS) either manually or automatically according to company-specific processes. This ensures that the employees responsible or external partners can view or process up-to-the-minute information.


Pre Requisite
                            
Required SAP Component Level
 

S​​AP Component

Required

SAP_ABA

701

SAP_BASIS

701

PLMWUI

700

EA-APPL

604

EA_IPPE

404

SAP_APPL

604

SAP_BS_FND

701


Operating System Components


SAP Component

Required

Windows Operating System

Server 2003/2008/Windows7

IIS Version

7

Microsoft Office Version

2003/2007/2010

Hard Disk Space

For OS 50GB

RAM

4GB Min


Download Software Components


Installation Master

Service.s ap.com /s wdc > SAP Netweaver > SAP Netweaver

7.0 > Installation and Upgrade > Micros oft Windows >

51038621_11 , 51038621_12 , 51038621_13 ( Depends on your Operating System )

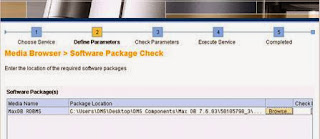
SAP Content Server 6.40

Service.s ap.com /s wdc > SAP Netweaver > SAP Netweaver

7.0 > Installation and Upgrade > Micros oft Windows >

50105790_2

Max DB Release 7.6

Service.s ap.com /s wdc > SAP Netweaver > SAP Netweaver

7.0 > Ins tllation and Upgrade > Micros oft Windows >

50105790_3

MAX DB GUI

Service.s ap.com /s wdc > Search for Software Downloads > Search with term 51020621 > Download CD RDBMS SAP DB 7.3.0 Build 46 RELIANT


IIS Installation


On Windows Server navigate to following menu

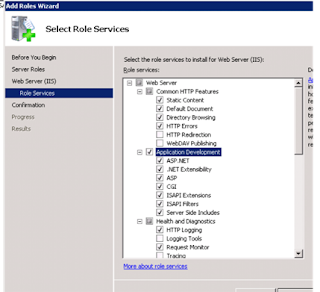
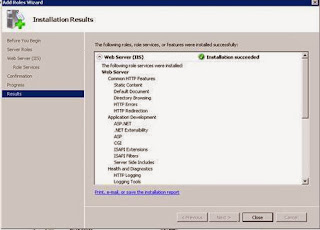
Start > All Programs > Administrative Tools > Server Manager > Click Add Roles to install IIS on Windows Server and follow screenshot.

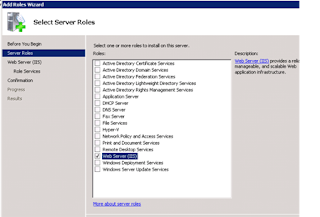


IIS Roles Required


Common HTTP Features

Static Content , Default Document, Directory Browsing, HTTP Errors , HTTP Redirections

Application Development

ASP .NET, .NET Extensibility, ASP, CGI, ISAPI Extensions ISAPI Filters , Server Side Includes

Health and Diagnostics

HTTP Logging, Request Monitor, Logging Tools , Tracing Custom Login, ODBC Logging

Security

Basic Authentication, Windows Authentication, Request Filtering

Performance

Static content Com pres s ion, Dynamic Content Compression

Management Tools

IIS Management Cons ole, IIS Management Scripts and Tools ,Management Service

IIS 6 Management Compatibility

IIS 6 Meta base compatibility, IIS 6 WMI Compatibility ,IIS6 Scripting Tools , IIS 6 Management Cons ole


Firewall Settings


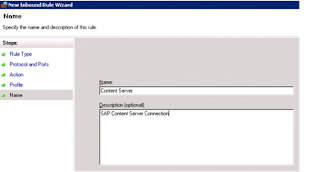
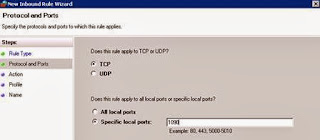
Navigate to Start > All Programs > Administrative Tools > Windows Firewall with Advanced Security

Create A New Inbound Rule - Type for Port and allow the connections for all.


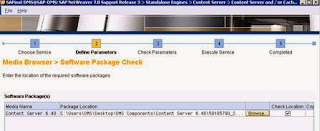
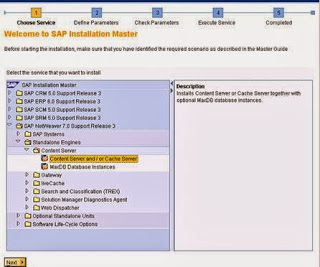
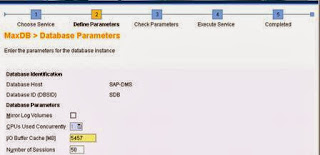
Content Server Installation


Testing Content Server Installation
       

Open a web browser and enter the following address .

http:\\servername:1090\ContentServer\ContentServer.dll?serverInfo

replace server name with the name of your server ip address or hostname where content server has been installed. A response below will s how that content server is running.


Windows Server Tasks before Configuring SAP


Navigate to Start > All Program s > Administrative Tools > Server Manager (DMS Host Nam e) > Sites and Select SAP Content Server Site > Edit the perm is s ion to Full Control for Users .


Navigate to Start > All Programs > Administrative Tools > Server Manager (DMS Host Name) > Double click on ISAP and CGI Restriction and follow window will open. Click on Edit Feature Settings  and check Allowed  specified ISAPI Modules
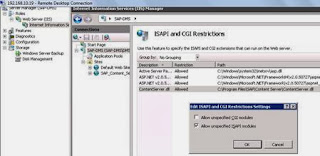


Restart the IIS Server.

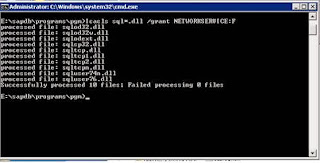
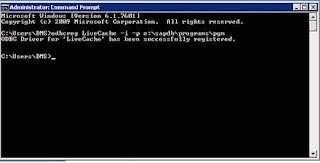
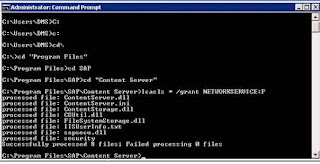
Open command prompt and enter following commands at specified paths in screenshots


MAX DB GUI Installation


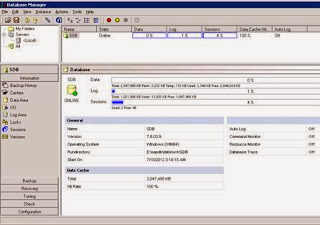
Max DB GUI can be installed from CD number mentioned above

After Installing the GUI the below screen will com e. Right click on Servers and register an instance


Configuring SAP to Connect to DMS


Prerequisites :


ICM is configured correctly and profile parameter icm/s erver_port_0 is PROT=HTTP,PORT=80$$


You have created and RFC connection type TCP/IP connection with name SAPHTTP and registered program saphttp in technical settings . Keep other fields blank and test it.

Content Server & ICM Services are activated in trans action SICF


Go to trans action OAC0

Display Content Repository overview and Create a New Entry as shown below and test the connection. Clicking on m ail symbol will import the certificate.
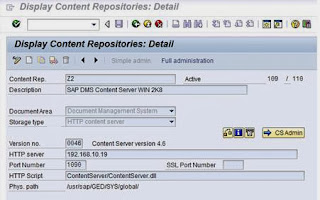


Click on CSAdmin. If the connection is successful you will see following screen, which completes configuration from admin.
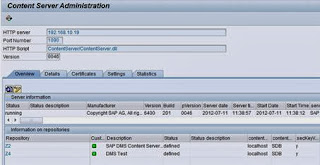


References


Note 1367514 - Regis try Settings in SAP Eas y Docum ent Managem ent


Read more...

Wednesday, October 23, 2013

Installation of Printer Drivers & Printer Configuration

0 comments
Installation of Printer Drivers and addition of printer in SAP


Download Drivers


Download printer drivers for SAP from vendor site. Drivers will be in .PRI format and save it to local PC.


Uploading Drivers to SAP


You need to upload drivers into SAP. To do this go to TCode SPAD > Utilities > For Device Types > Export  (OR) Run report RSTXSCRP from SE38


In next screen click on radio button Device Type and provide object name usually this would be .PRI file name. Execute report .


Assign this object to a package and give person responsible name


This will generate a transport request. Once TR is created browse to driver path.


Create Printer for new device Type


SPAD > Output Devices > Display > Go to change mode and click on create button


Select device type from available devices from drop down menu under Device Attributes


Input all required field entries and Save Settings. You can transport this printer through request by clicking on truck button.


Read more...